The Version Control Panel provides comprehensive project-wide version control management with support for branching, merging, committing changes, and viewing commit history. Version control in Davinci is multiplayer-enabled, allowing teams to collaborate effectively on the same model with full branch management capabilities.Documentation Index
Fetch the complete documentation index at: https://docs.davinci-app.com/llms.txt
Use this file to discover all available pages before exploring further.
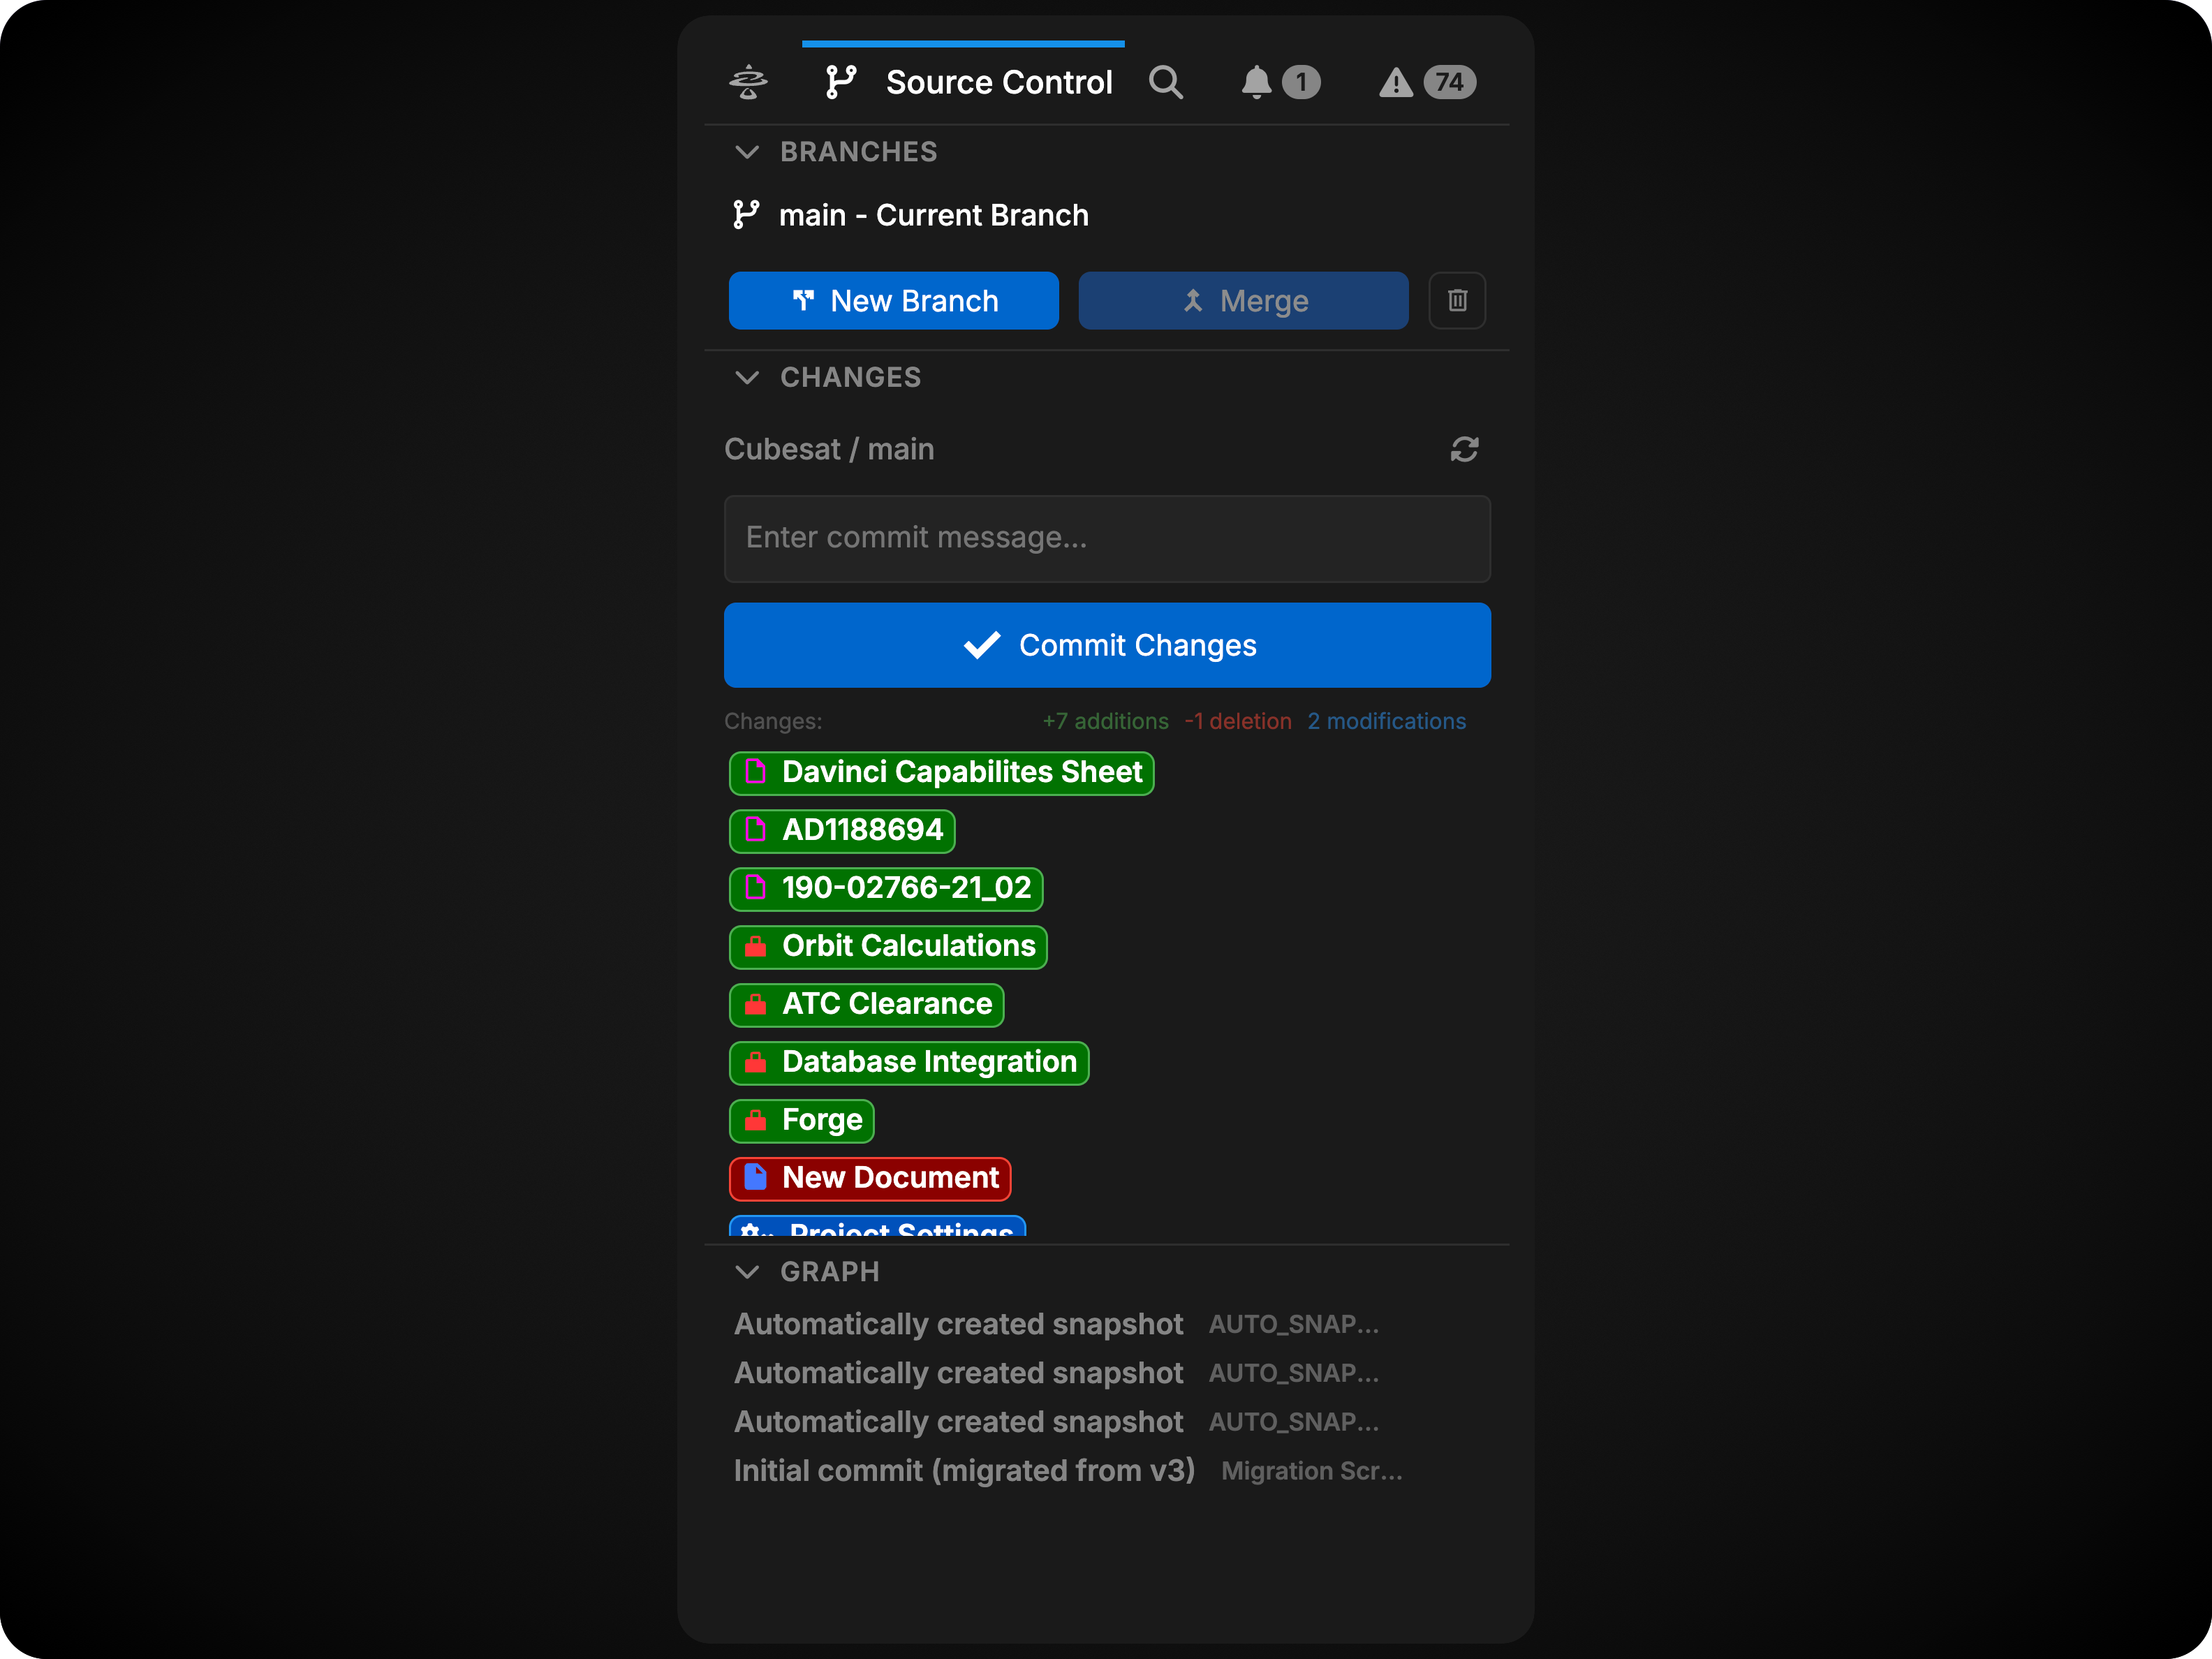
Branches
The Branches section allows you to manage all aspects of your project’s branch structure. Version control in Davinci operates at the project level, meaning all changes and branches are shared across all collaborators.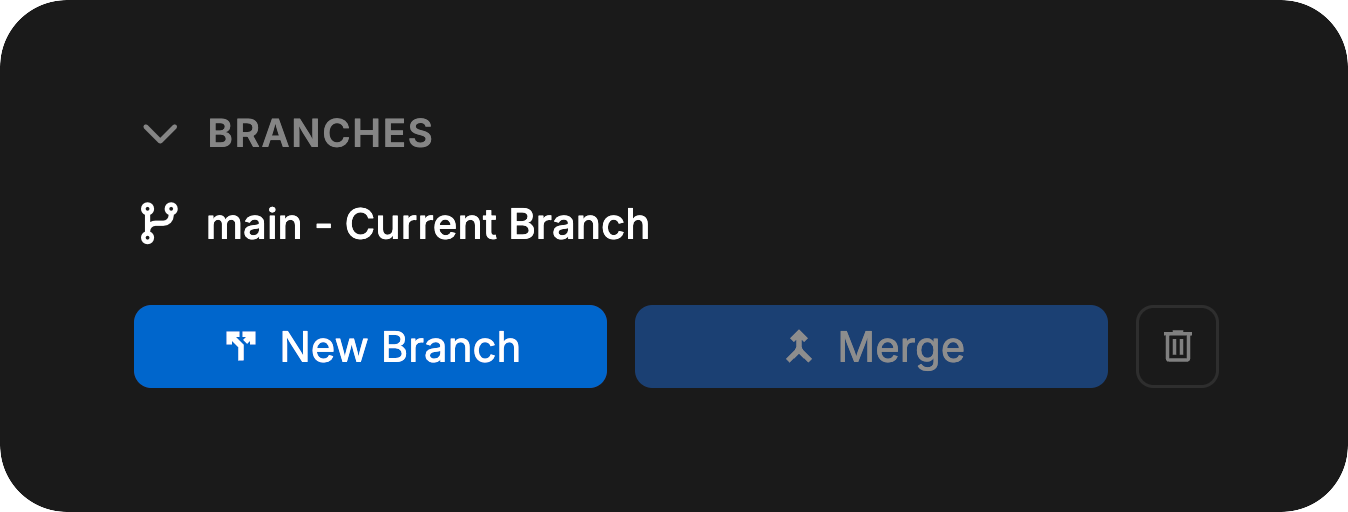
Creating Branches
New branches can be created from the current branch at any time. This allows you to experiment with changes or work on features in isolation without affecting the main branch.Switching Branches
You can switch between existing branches using the branch selector. When switching branches, any uncommitted changes will remain live in the previous branch and will be preserved when you return to that branch.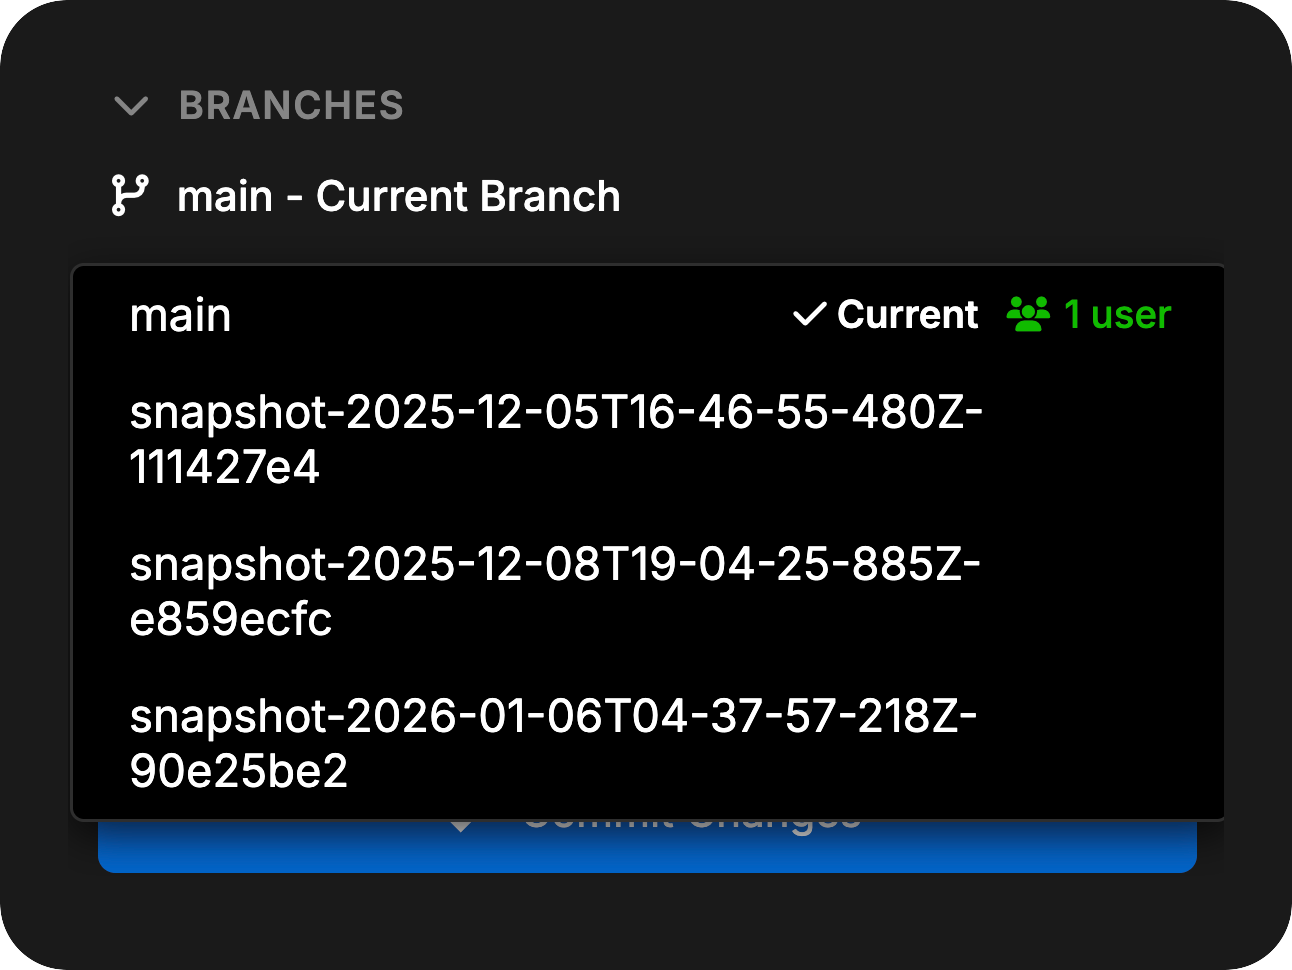
Uncommitted changes do not transfer between branches when switching. They remain in the branch where they were made.
Merging Branches
To merge changes from one branch into another:- First, switch to the branch you want to merge into (the target branch)
- Click the Merge button
- Select the branch you want to merge from (the source branch)
- Review the merge preview showing the number and types of changes that will be applied, along with any merge conflicts
- Complete the merge
- Resolve merge conflicts
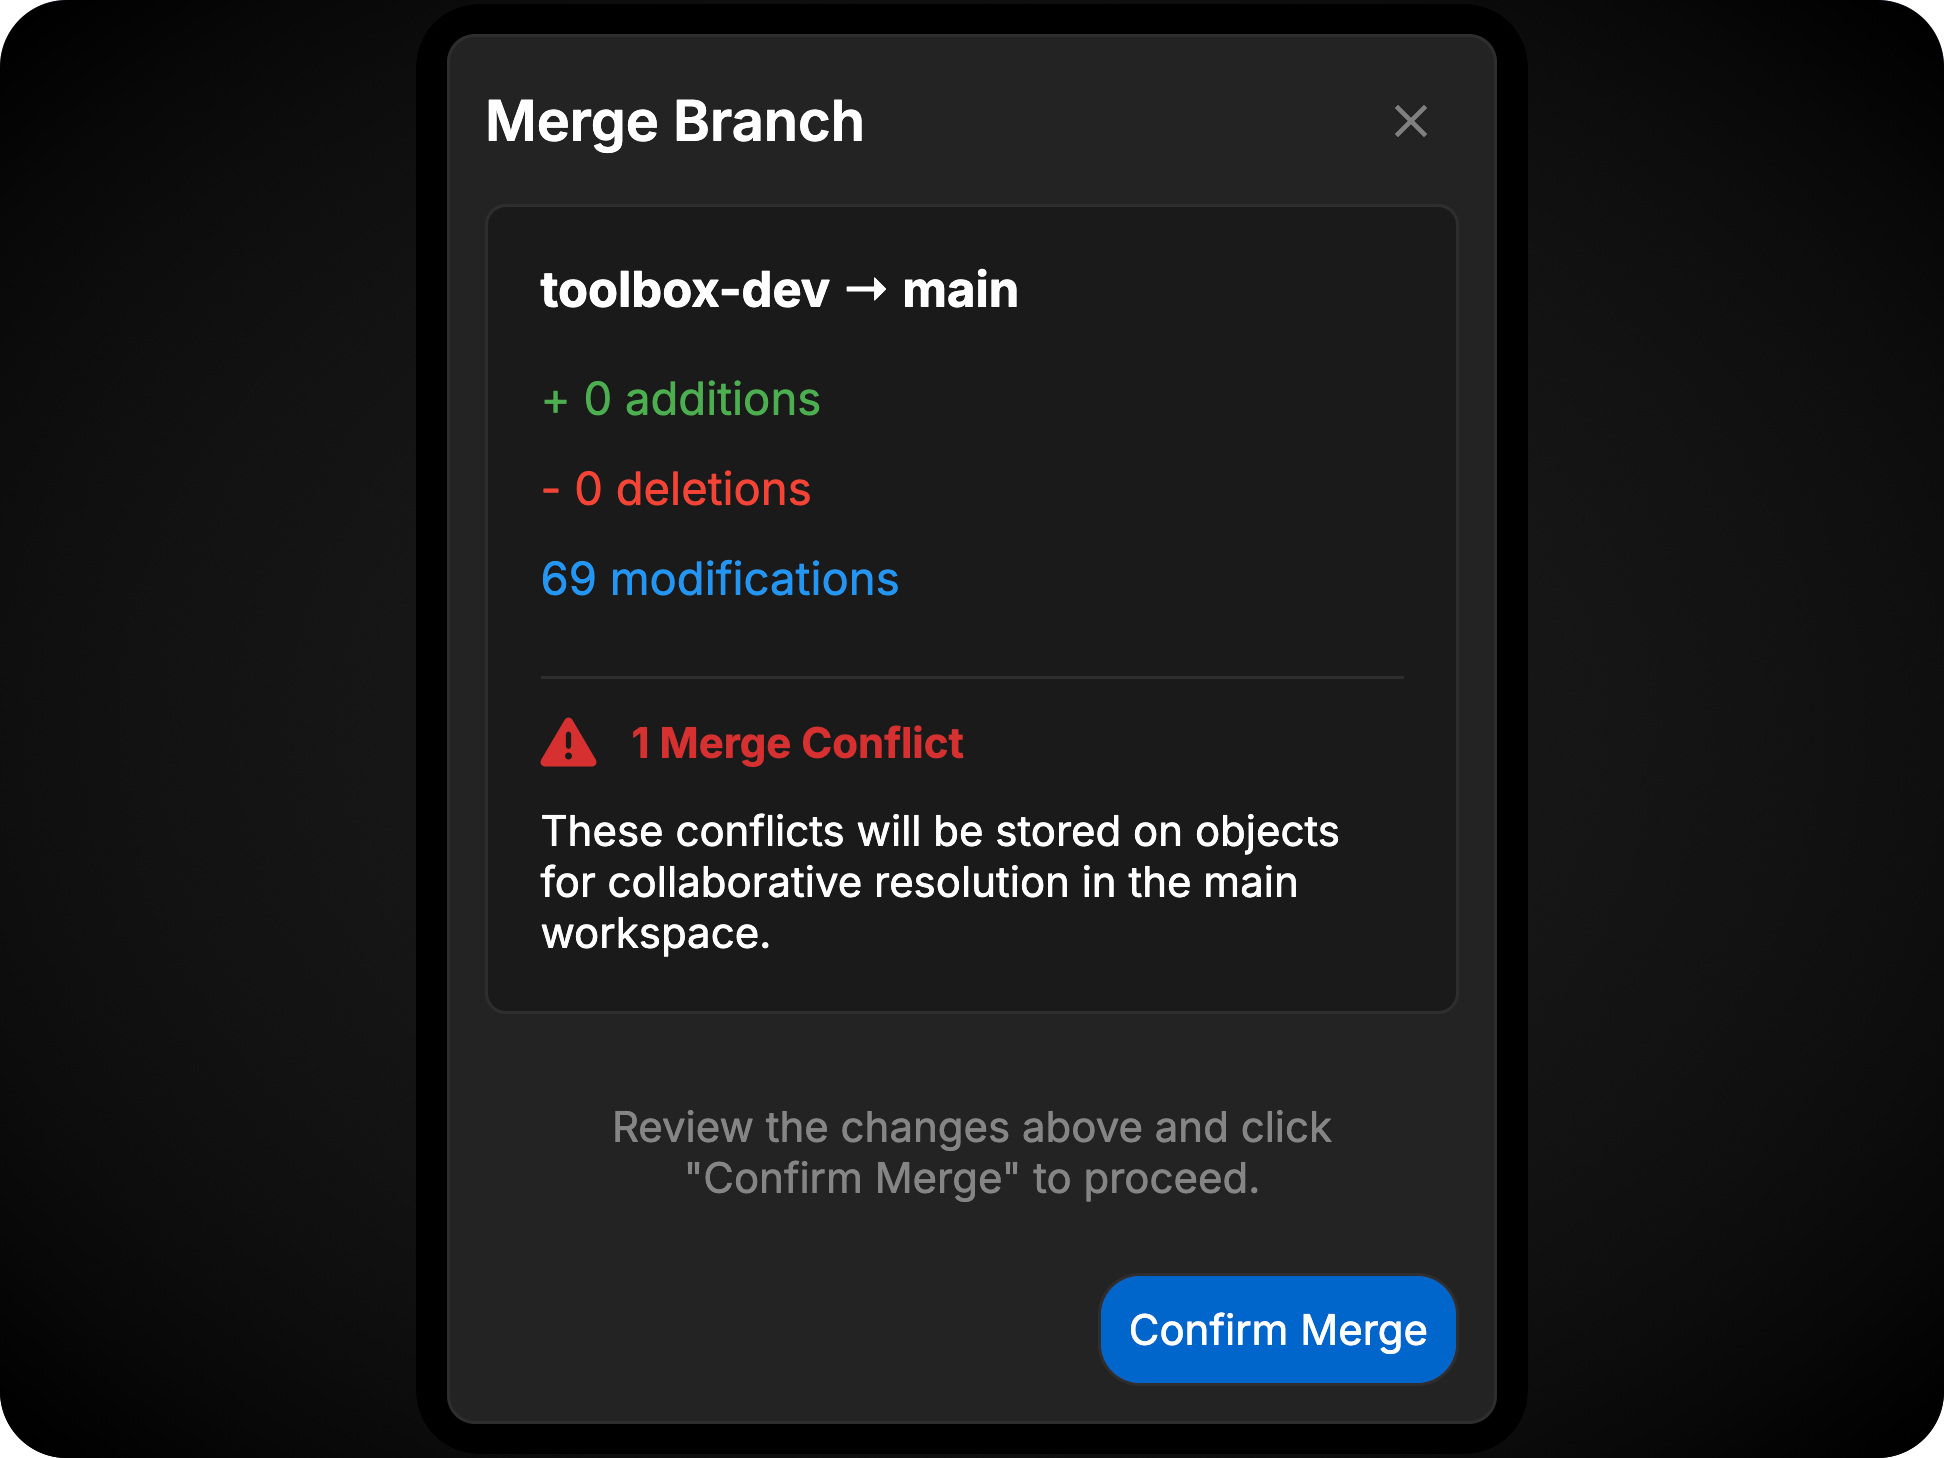
Merge Conflicts
Conflicts occur when the same object or field has been modified in different ways on both branches. Davinci identifies two types of conflicts for model objects: Change-Change Conflicts: The object was modified differently on both branches. You must select which version to keep or manually resolve the differences. Change-Delete Conflicts: The object was changed on one branch and deleted on the other. You must choose whether to keep the changed object or delete it entirely. All other scenarios are automatically resolved by Davinci’s merge logic.Resolving Conflicts
All merge conflicts in the model can be viewed from the Validation Panel using the Merge Conflict filter Merge conflicts can be resolved cooperatively by any team member working in that branch. All users will see the same conflicts and can work together to resolve them. When a conflict is resolved, it appears as a change in the Changes section. Commit the change to finalize the conflict resolution. Changes markedCurrent are from the active branch. Changes marked `Incoming

Project-level settings (units, secrets, dependencies, tags, and risk configurations) are also tracked by version control. Conflicts for these objects are managed from Project Settings.
Deleting Branches
Branches can be deleted when they are no longer needed. To delete a branch:- Select the trashcan icon in the Branch section
- In the menu, select the branch you would like to delete
- Select confirm
- If you are currently in the branch to be deleted, you will be asked again to confirm; Select confirm
Changes
The Changes section displays all modifications made since the last commit on the current branch. This section shows changes from all users working on the current branch, providing full transparency for collaborative work.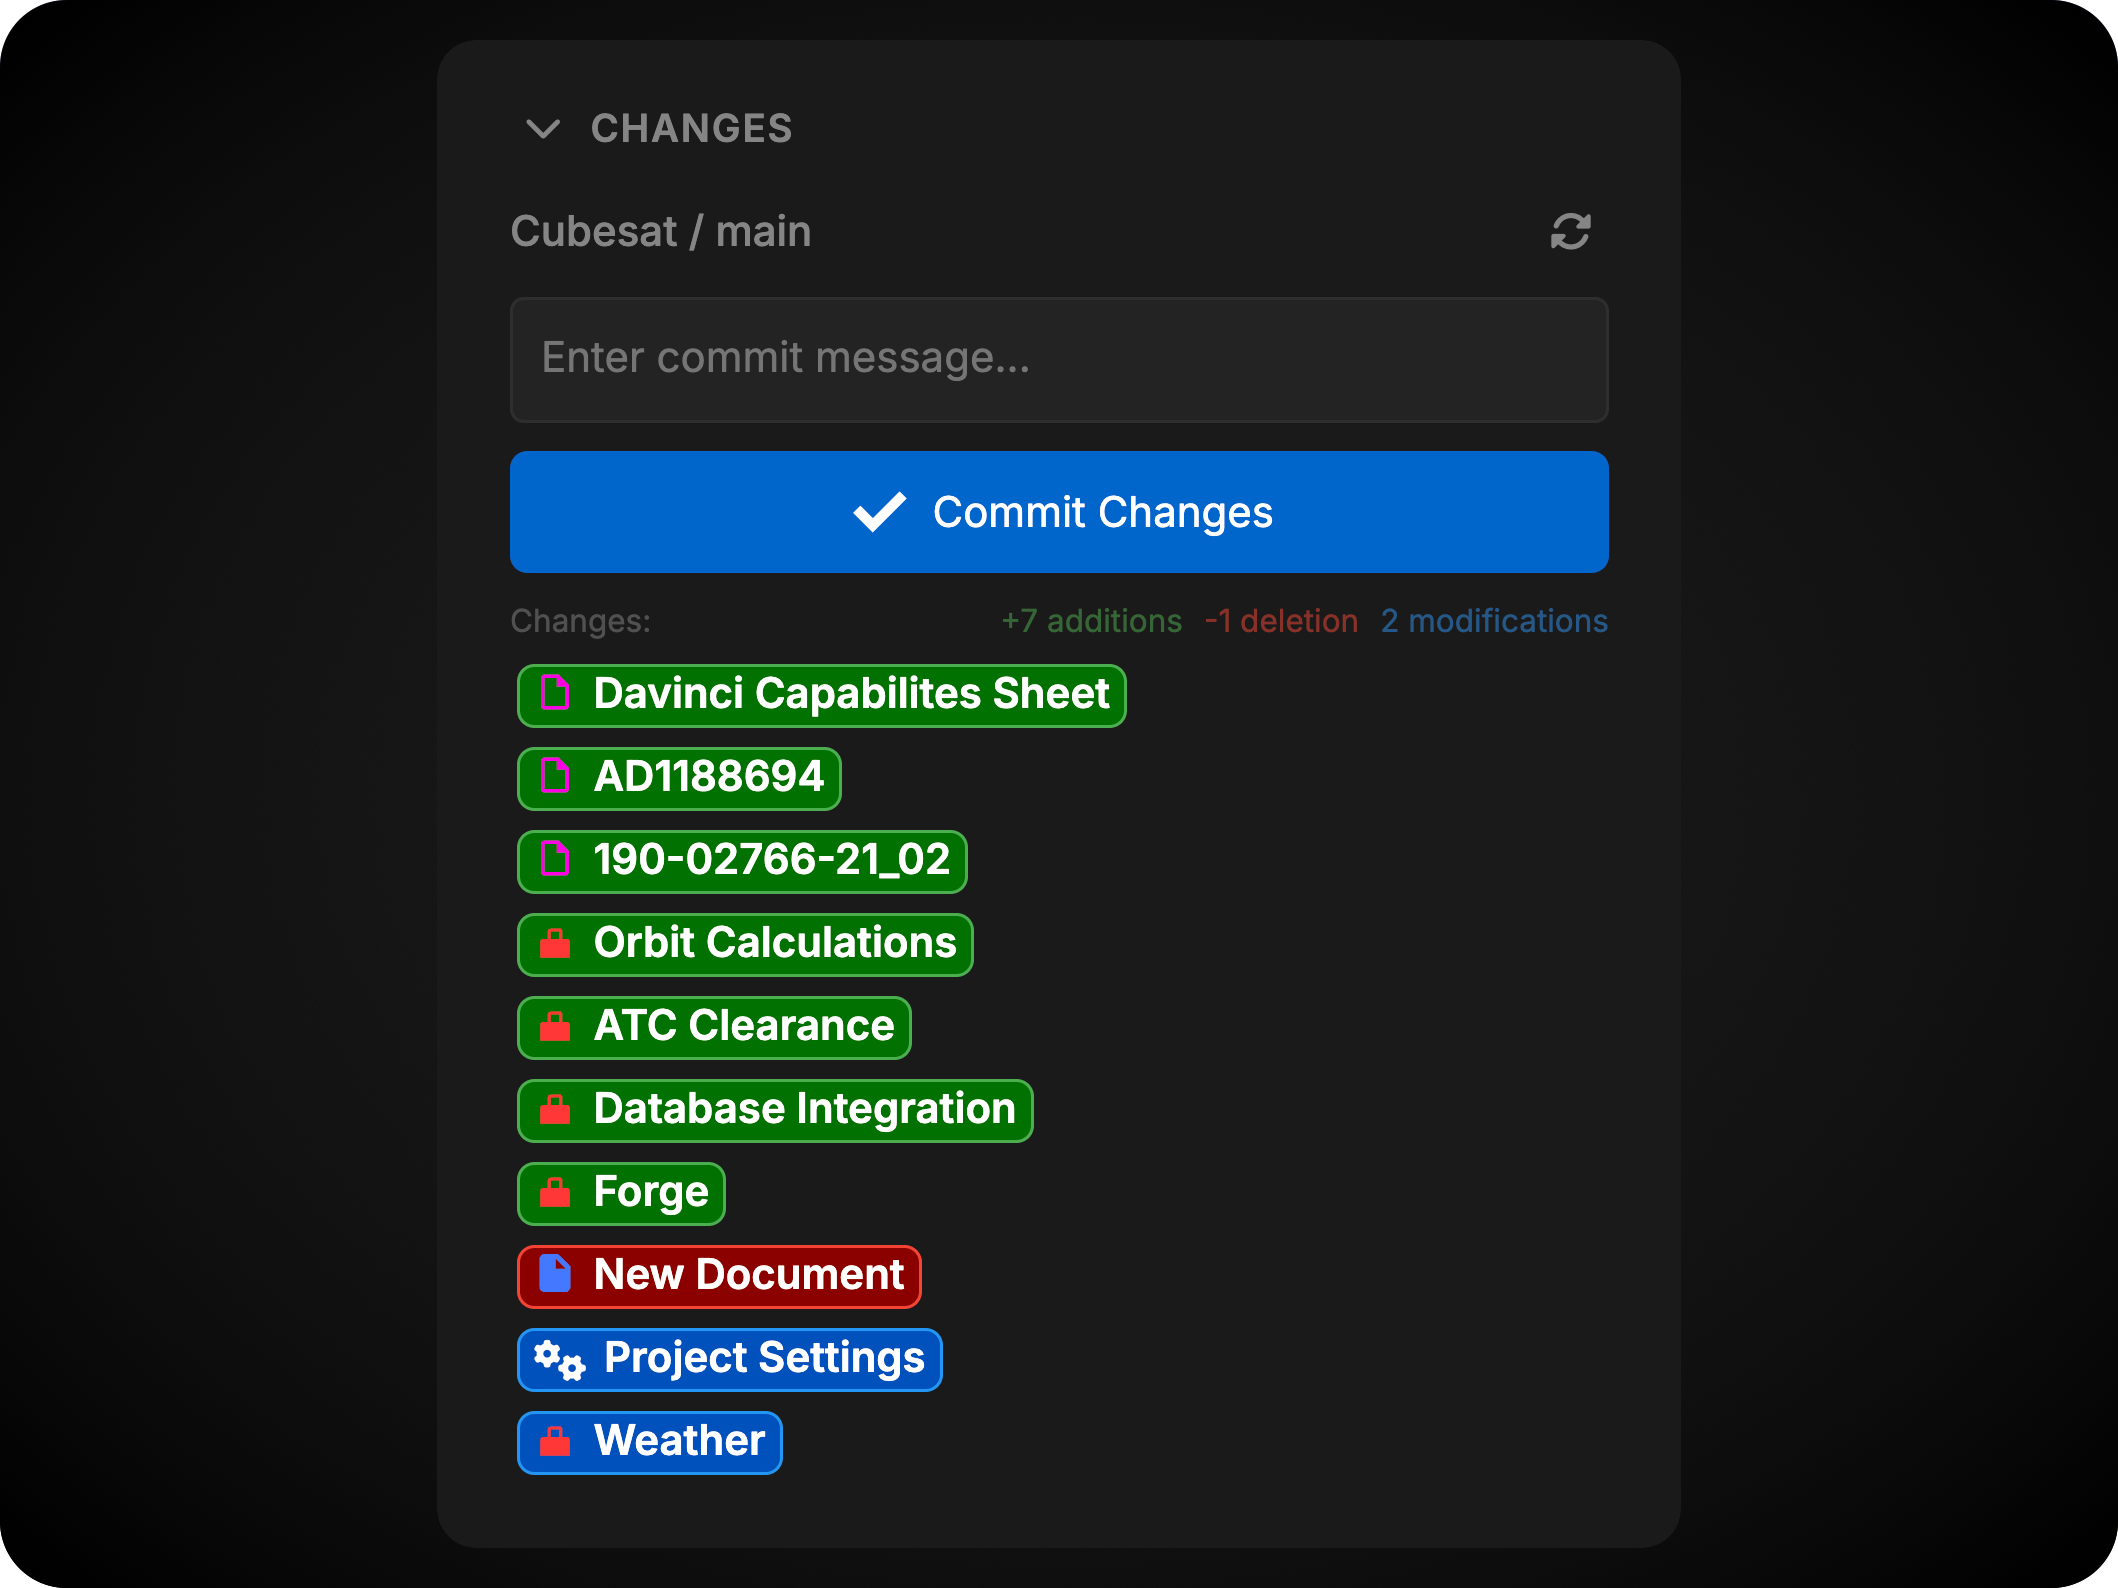
View Current Changes
Click on any object in the changes list to open a diff view showing exactly what has changed since the last commit. You can view both the live editable object and the diff view simultaneously for easy comparison. The diff view highlights:- Added content in green
- Removed content in red
- Modified fields with before/after comparisons
Undoing Changes
Each object in the changes list has an Undo button that will revert all changes made to that specific object since the last commit.Committing Changes
To commit your changes:- Review the list of modified objects
- Enter a descriptive commit message (required)
- Click the Commit button
Commits require at least one change since the last commit and a commit message. Commits are manual and only occur when explicitly performed by a user.
Graph
The Graph section displays the complete commit history for the current branch, showing a chronological list of all commits with their associated metadata.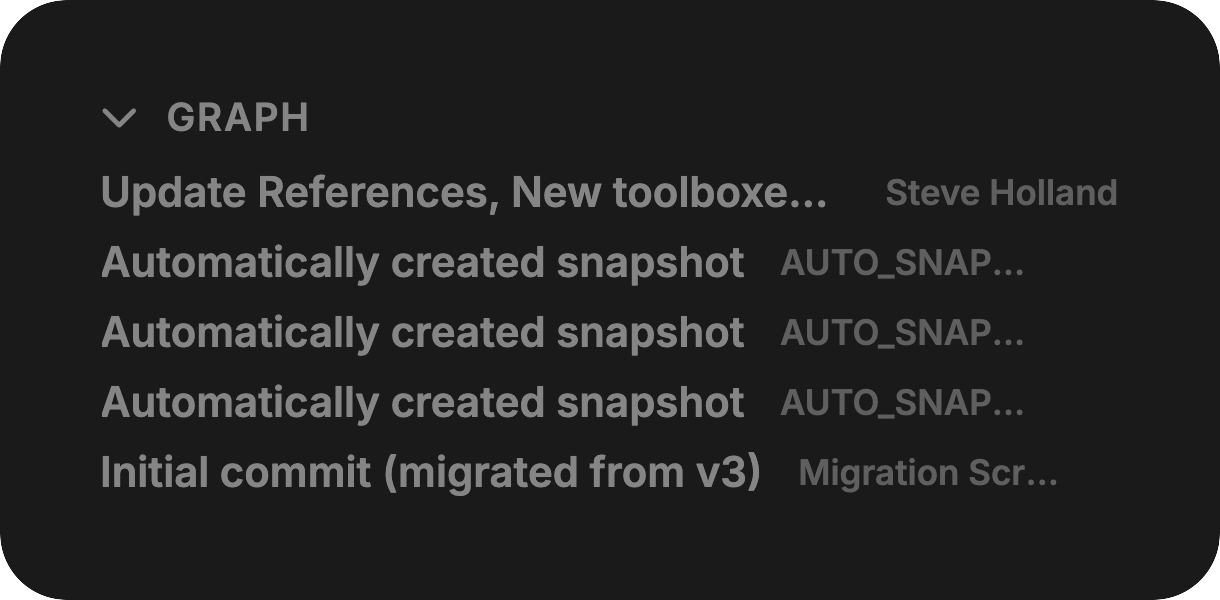
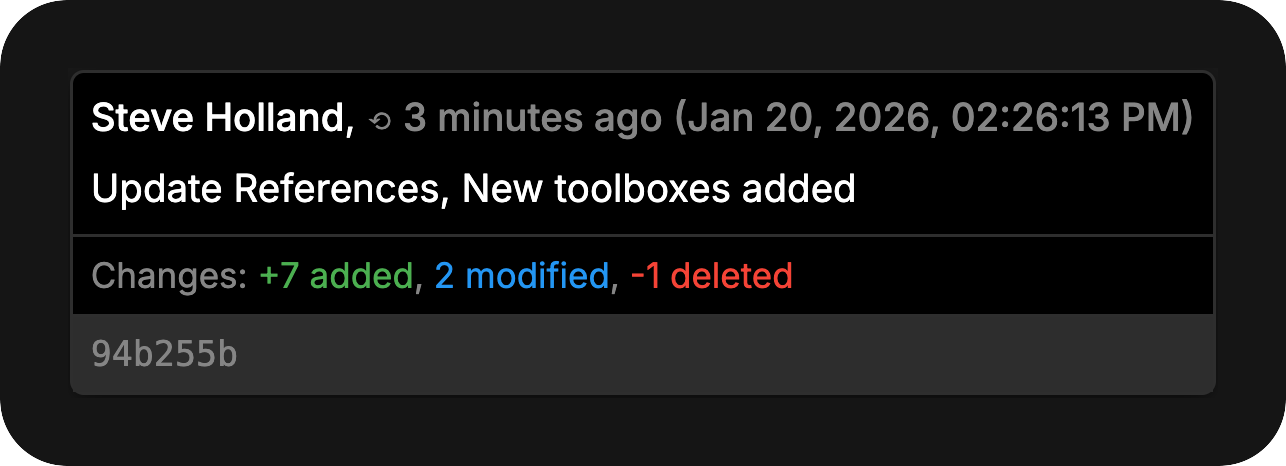
View Commit Details
Each commit in the graph shows:- Commit message
- Author name
- Commit timestamp
- Full commit hash
- Exact date and time
- Change statistics (Insertions, Deletions, Modifications)
Inspecting Commits
Click on any commit in the graph to open it in a new tab. From this detailed view you can:- See the complete list of objects modified in that commit
- Click on any object to view the diff showing changes applied by that commit
- Review the full context of what was changed and why
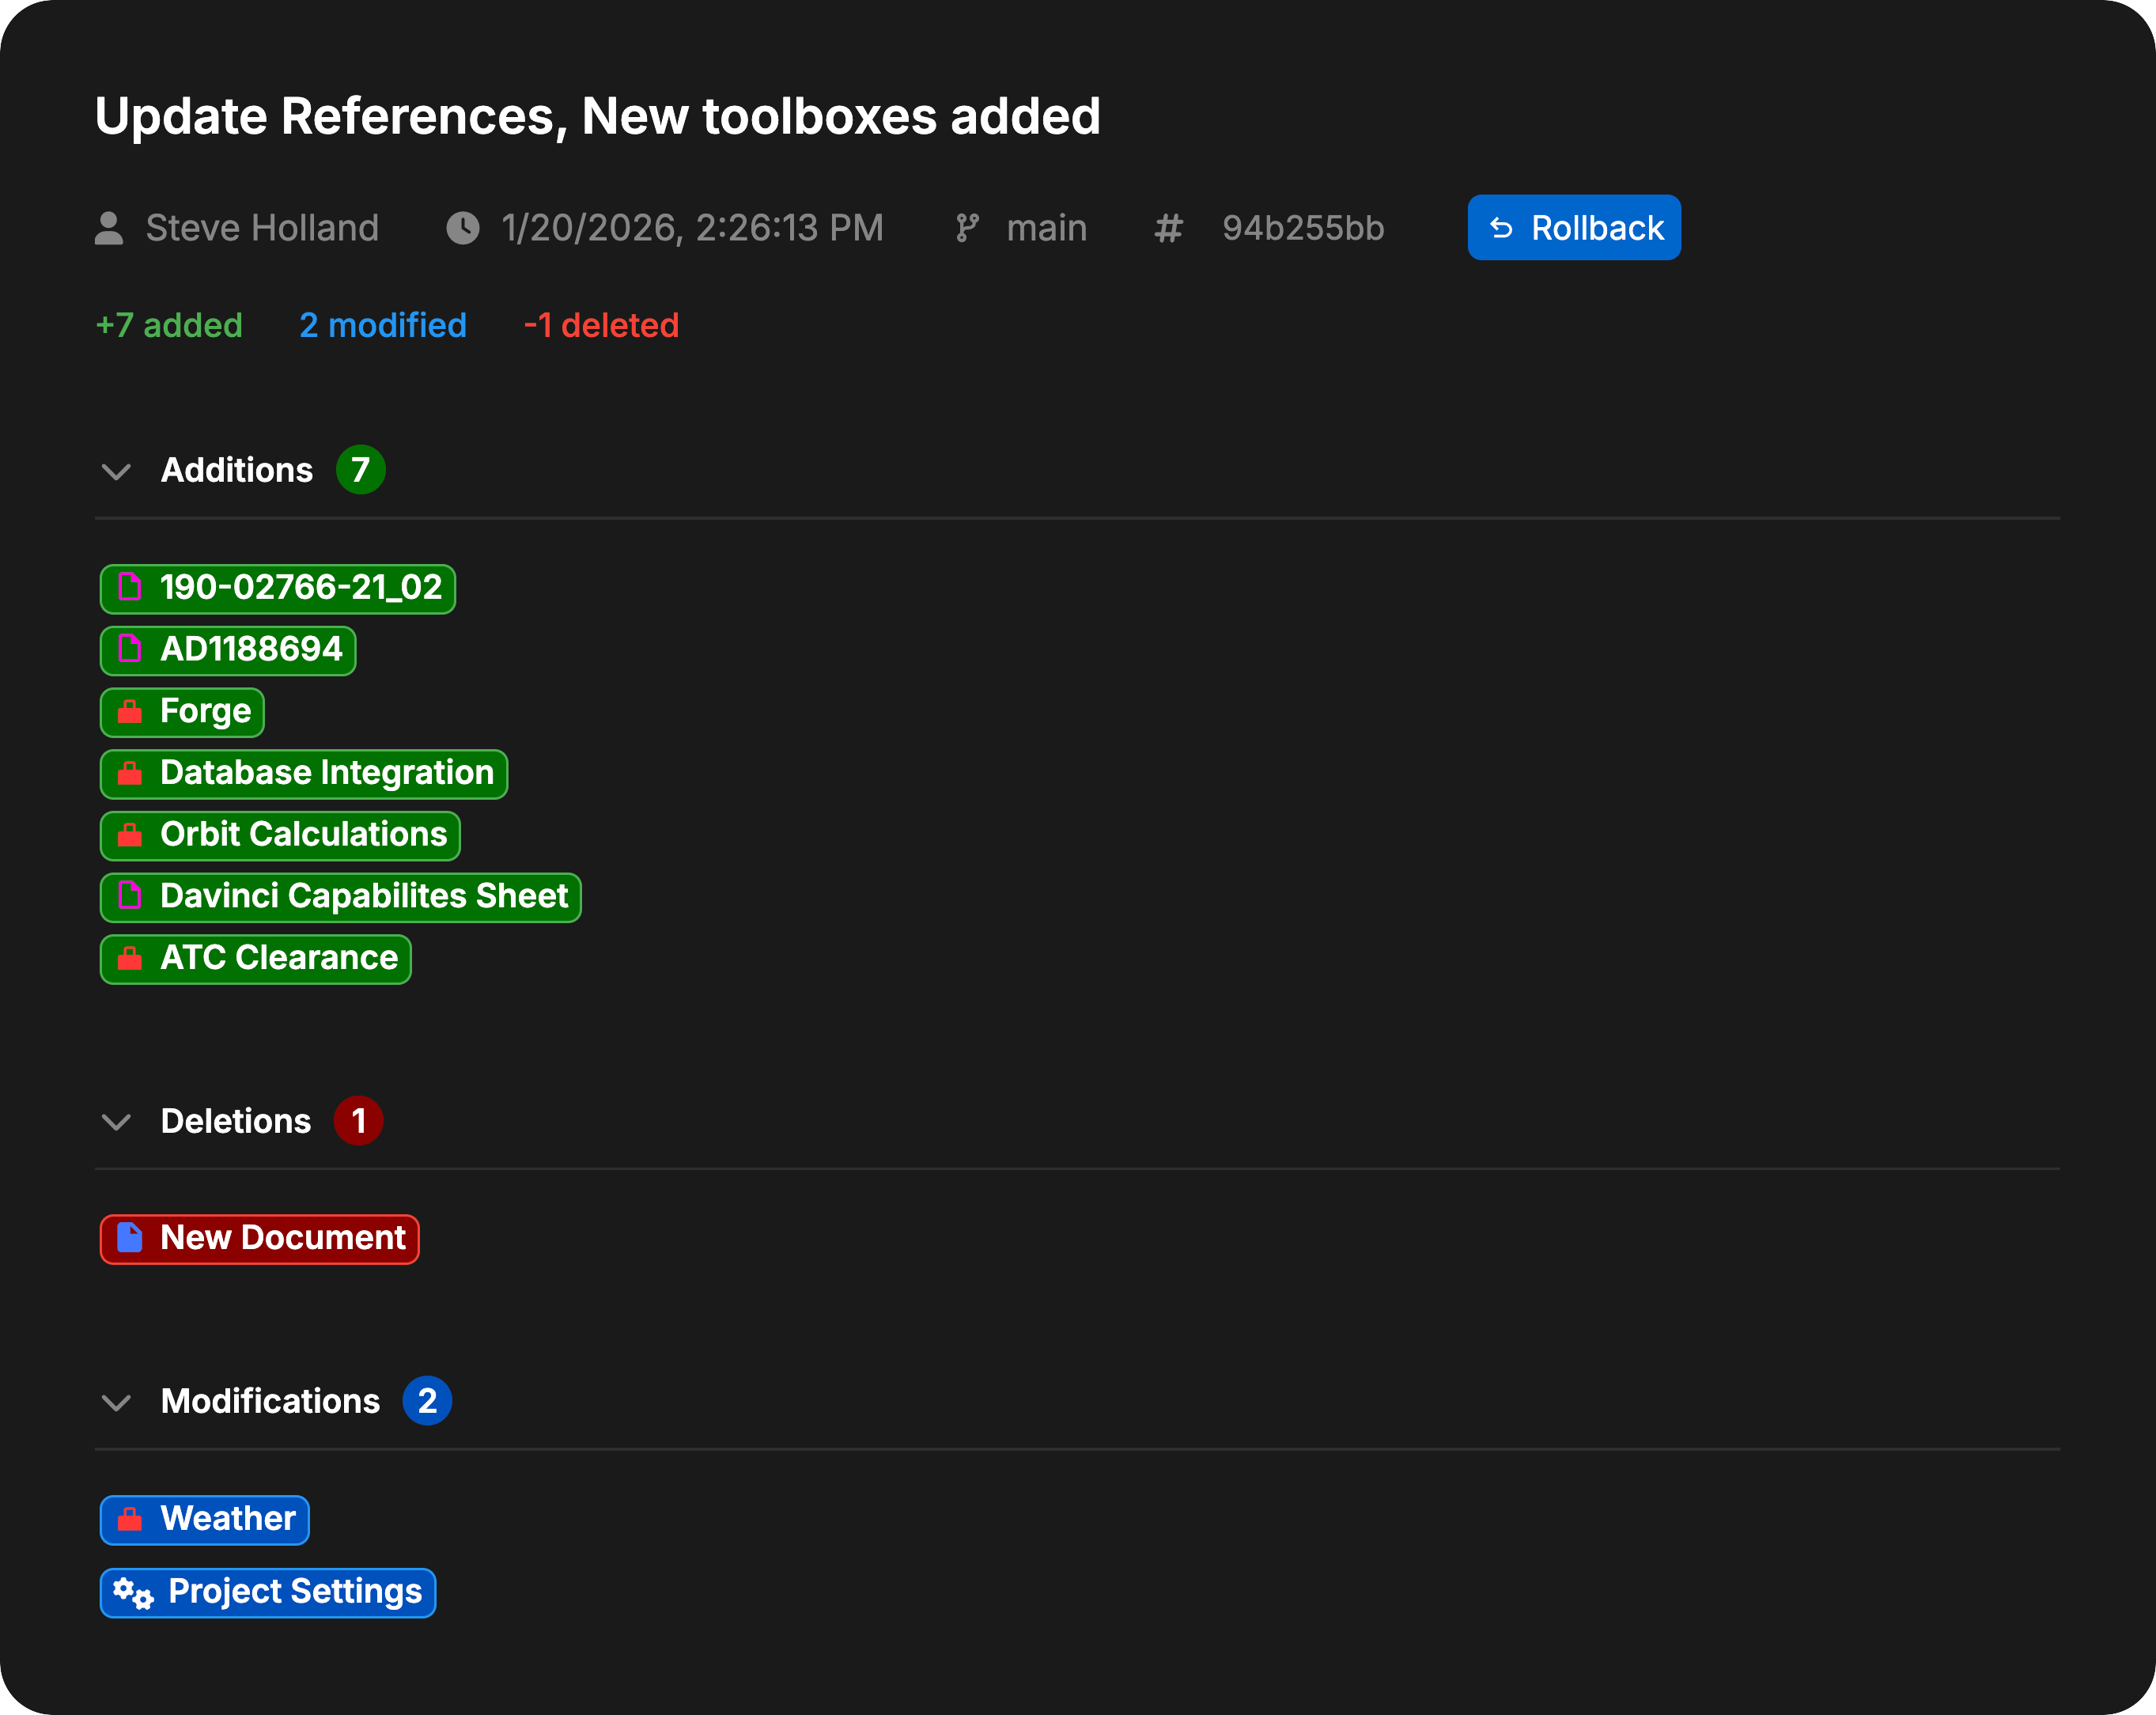
Rolling Back
You can roll back to any previous commit by clicking the Rollback button in the commit detail view. This will:- Create a new commit on the current branch
- Restore the project to the state it was in at that commit
- Preserve all commits between the rollback point and the current state (you won’t lose history)